
Step-by-step guide
How to use ScheduleTrue
Seven short steps, from your sales file to a clean upload. Try it with our sample files first. It takes about five minutes.
Watch the 3½-minute walkthrough, or follow the pictures below.
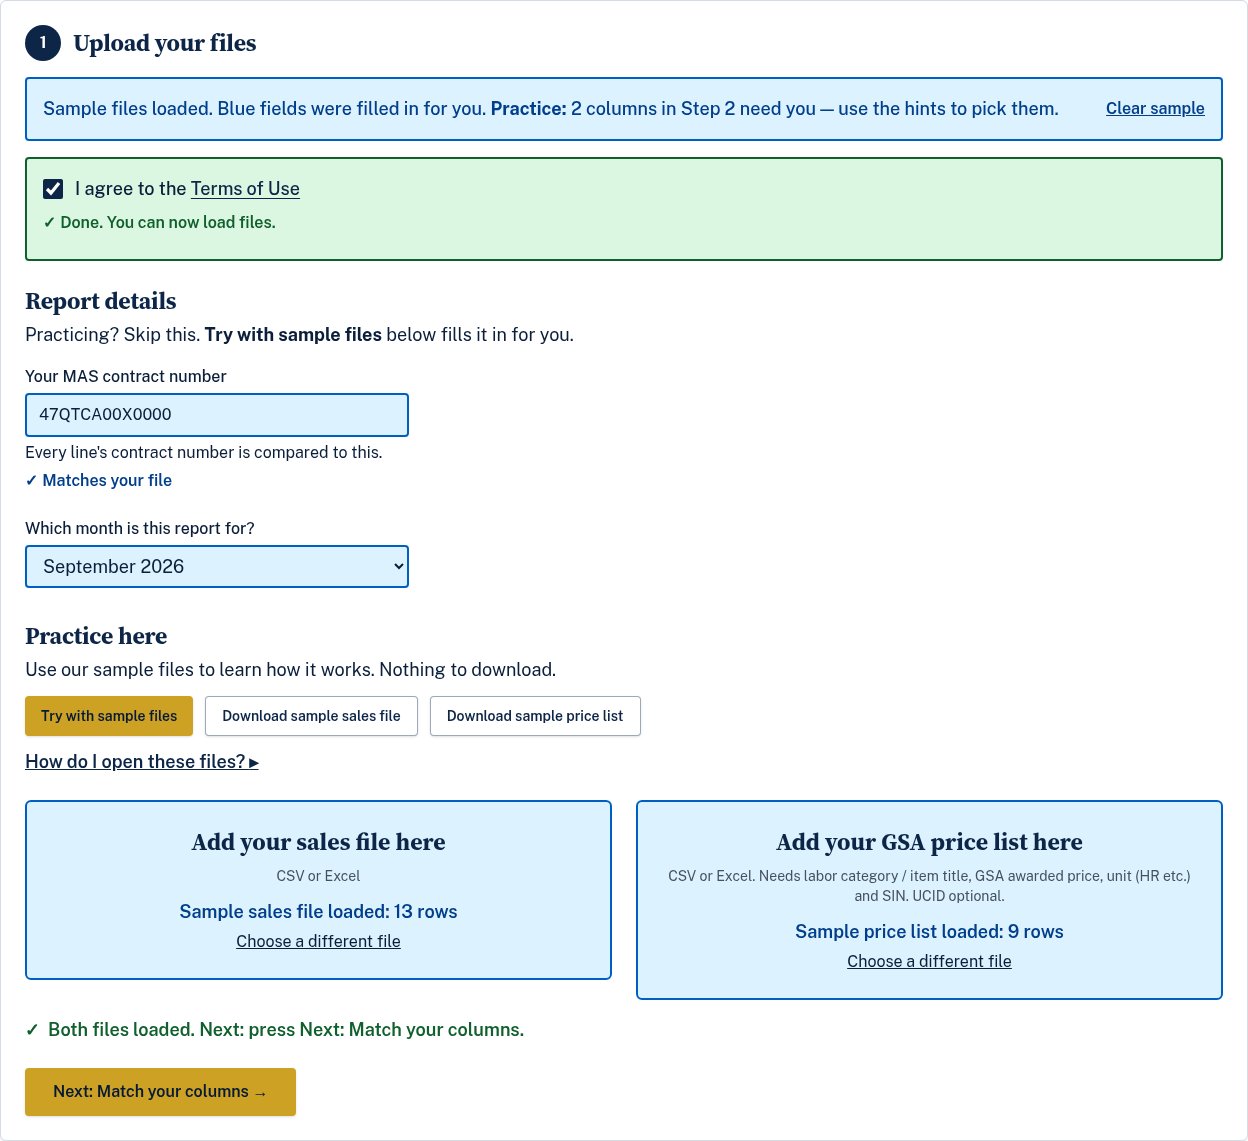
Step 1: Agree to the Terms, enter report details, then load your files
Open the checker. Click "I agree to the Terms of Use". Nothing loads until you do.
Next, under Report details, type your MAS contract number and pick the month the report is for. Practicing? Skip this. The sample fills it in for you.
To practice, press Try with sample files in the "Practice here" box. Or add your own monthly sales file and your GSA price list. CSV or Excel both work.
The page stays put while files load. When you're ready, press Next: Match your columns.
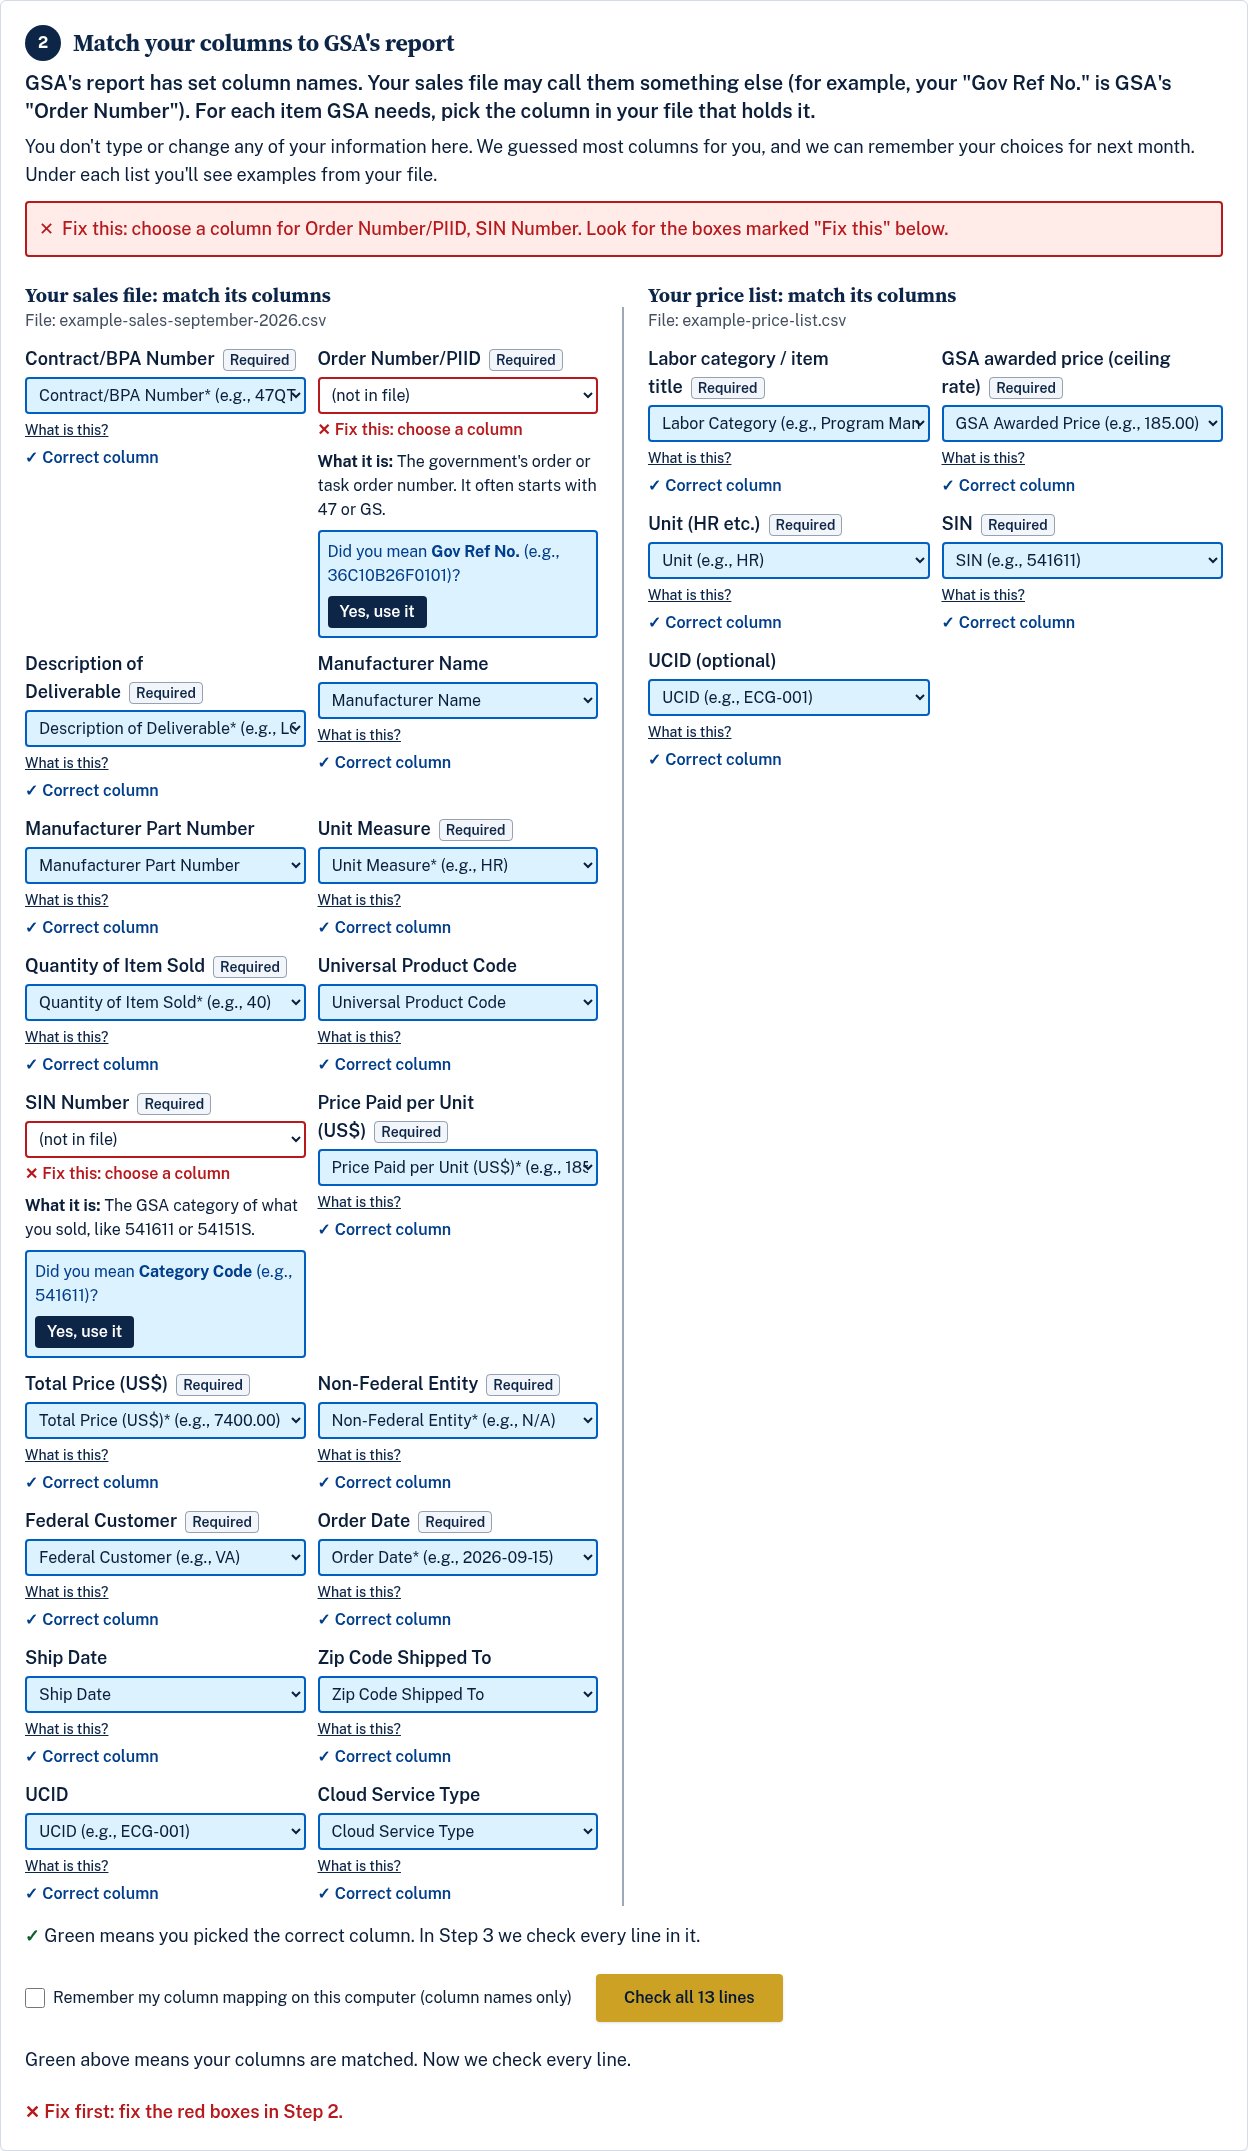
Step 2: Match your columns to GSA's report
GSA's report has set column names. Your file may call them something else. For example, the sample's "Gov Ref No." is GSA's "Order Number". For each item GSA needs, pick the column in your file that holds it. You don't change any of your information here.
Most columns are matched for you. A red item needs your choice. Each drop-down shows an example from your file, and a "best guess" you can accept with one click.
The sample leaves two items for you on purpose, so you can practice.
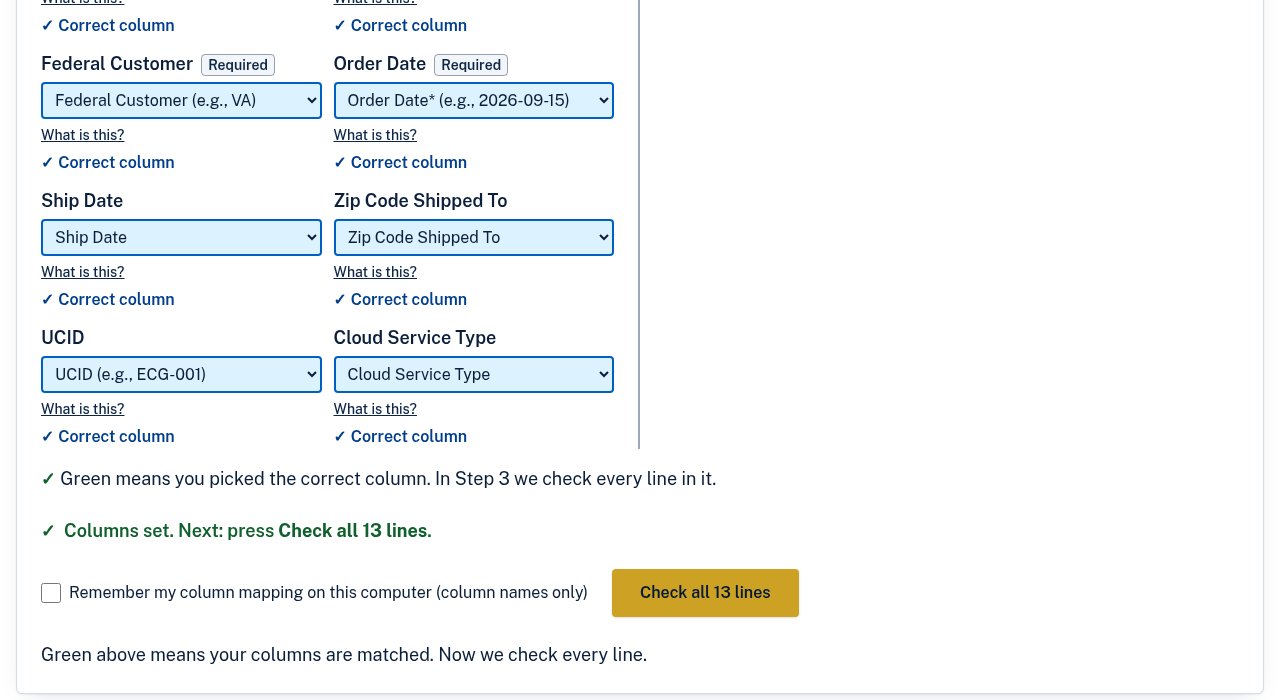
Step 3: Run the check
When every item says "Correct column", press Check all lines. The button shows how many lines are in your file.
ScheduleTrue checks each line against your price list and GSA's template rules. It takes a few seconds, then the page moves to the top of your results.
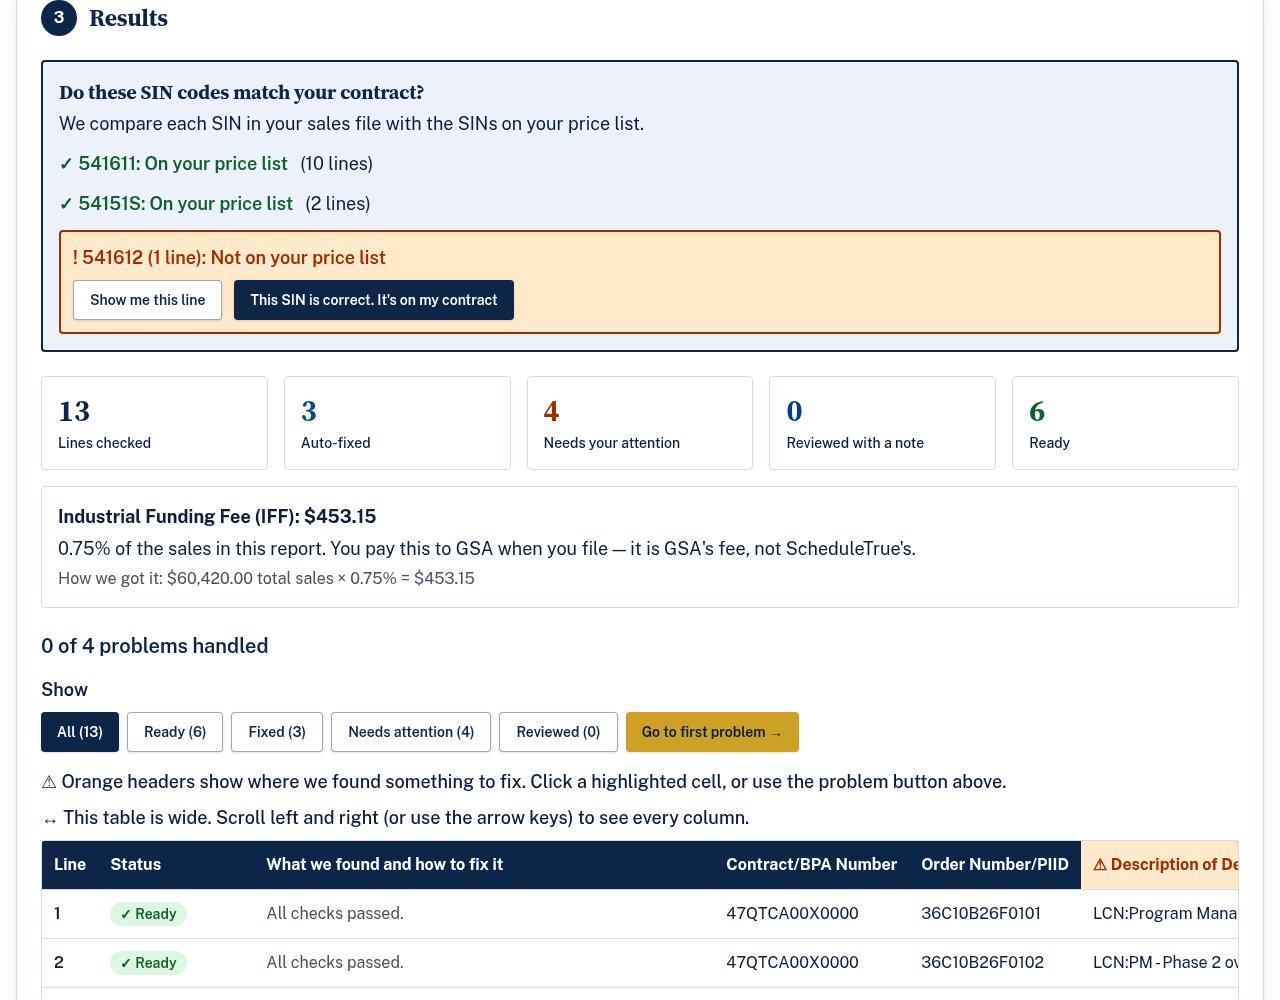
Step 4: Read the results
Each line gets one of three labels:
- Ready (green): the line passed every check.
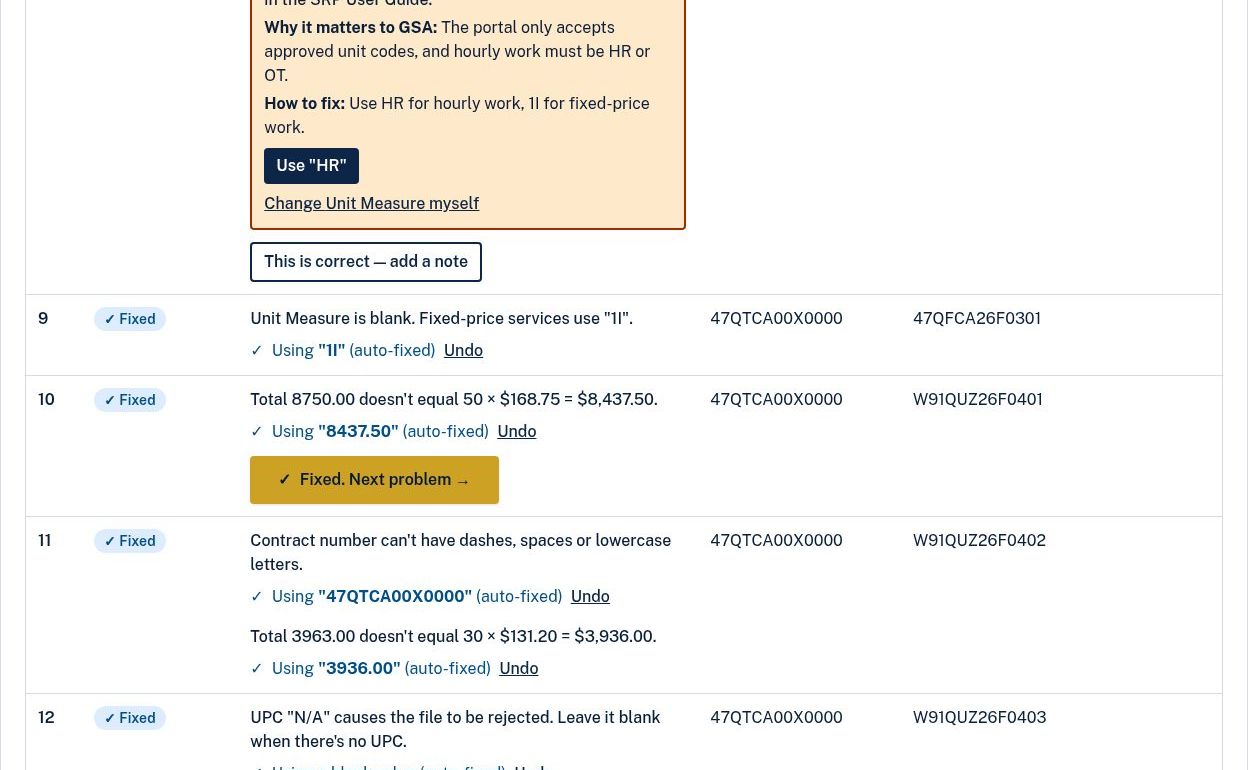
- Fixed (blue): we made a safe fix, such as a format or spelling change. You can undo it.
- Needs attention (orange): a judgment call only you can make. Each one says what is wrong, why it matters to GSA, and how to fix it.
The sample has 13 lines: 6 Ready, 3 Fixed and 4 that need your attention.
First, confirm the SIN codes at the top. The page also shows the Industrial Funding Fee you will owe GSA.
Step 5: Accept or reject the suggested fixes
On an orange line, press the suggested fix, or type the right value yourself.
If the value is correct for a good reason, press This is correct — add a note. The line turns "Reviewed".
In the sample you practice all four: use the GSA awarded price, check a SIN that isn't on the price list, add a note to a line that is correct, and change "EA" to "HR" with one click.
Don't agree with an automatic fix? Press Undo. Then press Next problem to move on.
Step 6: Download your corrected file and the "What we fixed" report
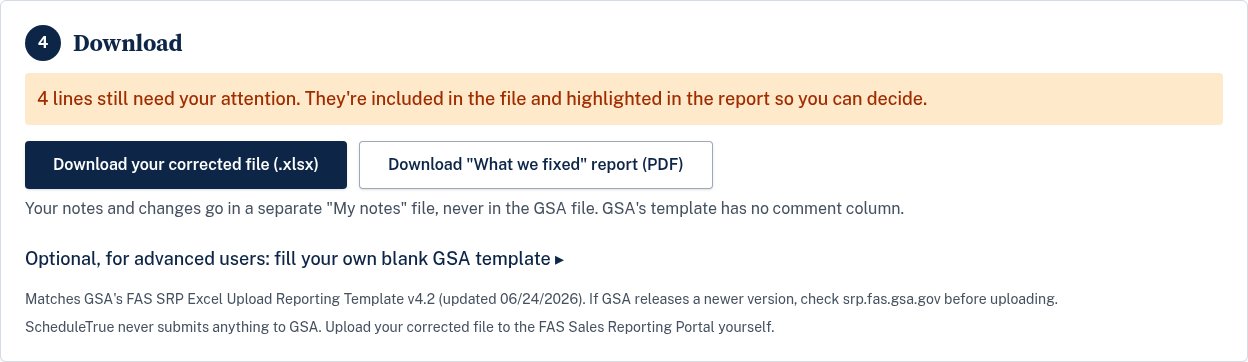
Press Download your corrected file (.xlsx). It is laid out in GSA's v4.2 upload template.
Press Download "What we fixed" report (PDF) to keep a record of every change for your files.
Need someone to look over your report? Below the download buttons is an optional section, Optional: share your file safely. It removes customer details before you share, and restores them later. Most people can skip it.
Step 7: Upload your corrected file to GSA yourself
Sign in to GSA's FAS Sales Reporting Portal with your own GSA sign-in.
Choose your contract and the month. Upload your corrected file. Then pay the Industrial Funding Fee shown.
ScheduleTrue never submits anything to GSA. You stay in control of what you file.
Your files never leave your computer
Your sales file and price list are read and checked right in your browser. They are never sent to us or stored. Close the tab and they are gone.